Test Settings
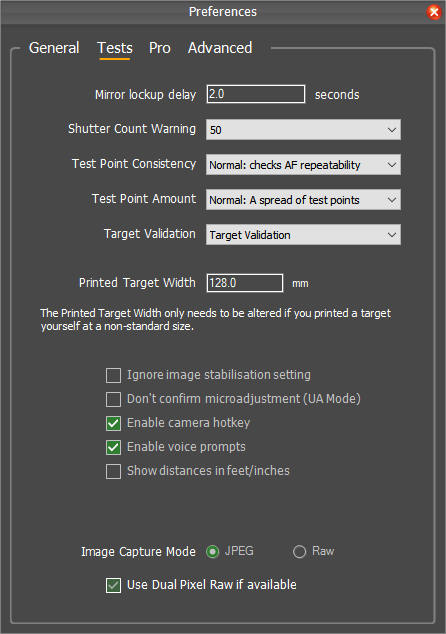
Mirror Lockup Delay
In order to ensure the most stable image when taking shots with the camera, FoCal uses Mirror Lockup. The mirror is raised, then there is a delay as specified by the Mirror Lockup Delay option before the shutter is activated.
Typically, this is set to 2 seconds. You may wish to increase the when using longer telephoto lenses or a lighter tripod.
Shutter Count Warning
A warning will be shown if this number of shots is taken during a test. You will then have the option to continue or stop the test.
Test Point Consistency Level
For Autofocus Calibration, a number of measurements are taken at each AF Microadjustment / Fine Tune value. Ideally, the measurements would be identical for each shot but in reality this will never happen (see An Introduction to Autofocus for lots more information).
This option allows you to tell FoCal how consistent you would like these results.
- None: Only a single shot will be taken at each AF Microadjustment / Fine Tune setting. This is not recommended for normal operation, but can be useful in some advanced cases.
- Normal: FoCal will take a number of shots at each setting, moving on when confident that the typical measurement value has been determined.
- Tight: This will instruct FoCal to keep taking shots until several are reporting very similar measurement results, giving a higher confidence that this is the typical measurement value.
You would normally leave this setting on Normal, but if you are experiencing results that vary between tests you may want to change the setting to Tight.
Test Point Amount
FoCal will take a set of measurements at various points across the AF Microadjustment / AF Fine Tune range. This option allows you to adjust how many different measurement are taken.
- Few: Only a few different AF Microadjustment / Fine Tune measurements are tested.
- Normal: A good spread of different settings are tested.
- Many: FoCal will test a lot of different AF Microadjustment / Fine Tune settings.
Target Validation
FoCal recognises the official FoCal target, and uses this to confirm the correct setup and operation of the calibration. There are a few different ways that this can be used:
- No Target Validation: If you wish to use a custom high-contrast target, you should set this option to No Target Validation. However, the analysis algorithms within FoCal are designed to work with the FoCal target so the results you get may not be correct. This option is only recommended for advanced users.
- Target Validation: This is the default option. FoCal will check that the target is in the correct location, distance, rotation etc for each shot and warn if there are any significant changes that may affect the test operation.
- Target Optimisations: This setting uses knowledge of the target to adjust the analysis for better results under varying conditions. This option may give better results if you are testing with longer lenses or under unstable conditions.
Printed Target Width
In order for FoCal to correctly determine the distance between the camera and the target, the software must know the size of the FoCal target.
If you have printed your own target, you should measure the distance as indicated on the printed image and enter the value here. If you print at standard size on A4 or US Letter paper, the default value of 128.0mm will be acceptable. However, if you scale the image to print either a smaller or larger target, you will need to adjust this value.
For a Standard (150mm) FoCal Hard Target, this setting should be set to 128.0mm (the default value).
If you are using a large FoCal Hard Target, this setting will be ignored.
Note that this setting is only used to determine the target distance. An incorrect value will not affect the analysis results for any tests – it will just mean that the reported distance in the results will be incorrect.
Ignore Image Stabilisation Setting
For most tests, you want to make sure that any image stabilisation* supported by your camera/lens is disabled. Where possible, FoCal will try to check whether image stabilisation is enabled and warn you.
Due to firmware bugs and/or communication issues with third-party lenses, there are some cameras which incorrectly report that image stabilisation is enabled.
If you find that you are being warned of image stabilisation being active when you are absolutely sure it isn’t, you can tick this option to suppress this warning and allow tests to continue.
(* note that the term “image stabilisation” is used within the software to refer to the various technologies implemented across cameras and lenses. Where you see “image stabiliation” (with lower case initials), this can refer to Canon’s Image Stabilisation (IS), Nikon’s Vibration Reduction (VR), Sigma’s Optical Stabilisation (OS), Tamron’s Vibration Compensation (VC), Sony’s SteadyShot etc.)
Don’t confirm microadjustment (UA Mode)
There are some cameras which incorrectly report the AF Microadjustment / Fine Tune setting within the images, and FoCal can warn you of the setting not being applied correctly.
If you are finding that you are setting the correct value, but FoCal is telling you that it’s not right, you should enable this option to ignore validation of the set value.
Note: This will supress an important “safety check” for the calibration, so you should only use it if you are absolutely sure that the camera is mis-reporting the setting. As of 2019, only the Nikon D300s appears to erroneously report this setting, so please be very careful if enabling this option on any other camera!
Enable Camera Hotkey
When running a test with a User Assisted Mode camera, you will be periodically prompted to change the AF Microadjustment / Fine Tune value on the camera. This will usually mean stepping away from the computer to adjust the camera setting.
The Camera Hotkey is a way of using the camera controls to tell FoCal that you have made the change and it’s OK for the test to continue.
There’s more information on the details of User Assisted Mode and how to use the Camera Hotkey at User Assisted Mode (UAM).
Enable Voice Prompts
Closely linked with the Enable Camera Hotkey setting, the Enable Voice Prompts is designed to make User Assisted Mode quicker and easier to use.
If enabled, when FoCal needs the AF Microadjustment / Fine Tune setting to be changed you will hear a spoken instruction from the computer. In combination with the Camera Hotkey, this allows you to run a complete test from start to finish close to camera so it’s easy to make adjustments without having to return to the computer each time.
Again, see User Assisted Mode (UAM) for more details on how to use these features.
Show distances in feet/inches
By default, FoCal will show distances in metres. Tick this option to show all distance in feet and inches.
Image Capture Mode
The Image Capture Mode option allows you to choose between analysing JPEG or Raw images.
For almost all situations, JPEG analysis will be faster and just as accurate.
For some advanced situations (e.g. if you are specifically interested in the analysis of isolated red, green and blue colour channels) then you can tell FoCal to analyse the Raw images.
Use Dual Pixel Raw if available
FoCal offers some extra functionality for cameras which support Canon’s Dual Pixel Raw format. Tick this option and enable the feature on the camera to extract this information (typically extra focus information available in the charts for calibration, AF Consistency and Aperture Sharpness tests).
Note that as of FoCal 2.9, this feature is somewhat experimental.
General Preferences | This Page | FoCal Pro Settings