Four steps to a calibrated lens.
FoCal takes control of your camera and does the hard work. Your part is a tripod, a target on the wall and a cable to your computer.
- 1
Connect
Camera on a tripod, the FoCal target on a wall, and a USB cable to your Windows PC or Mac. FoCal takes control of the camera.
- 2
Check the setup
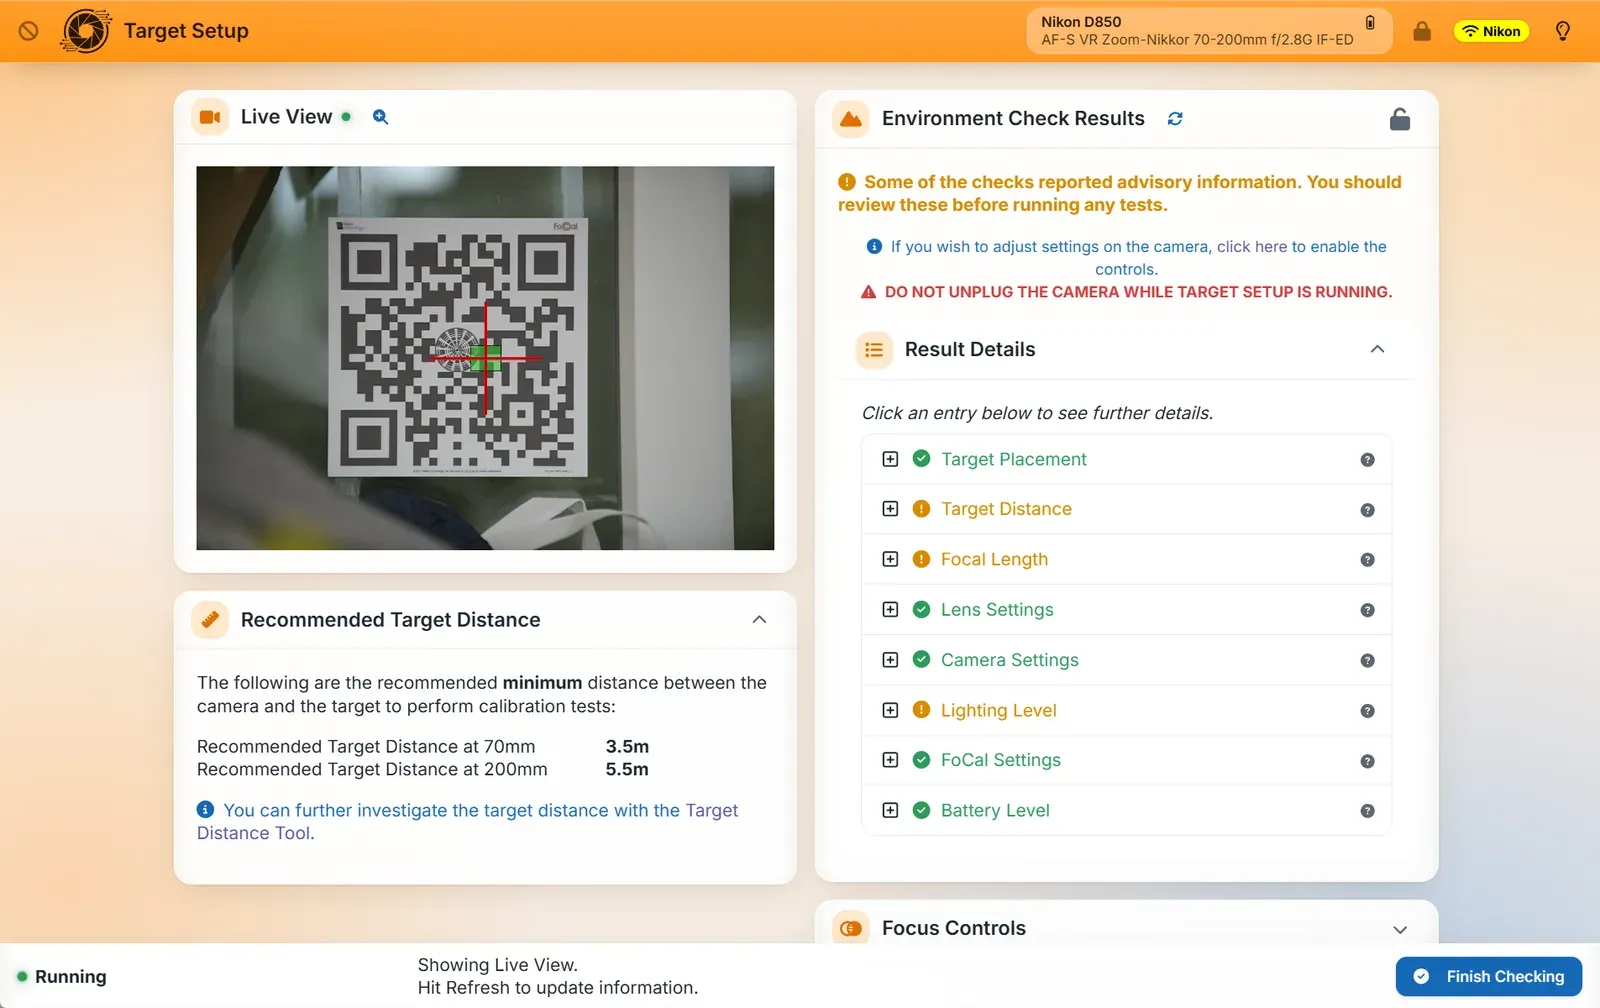
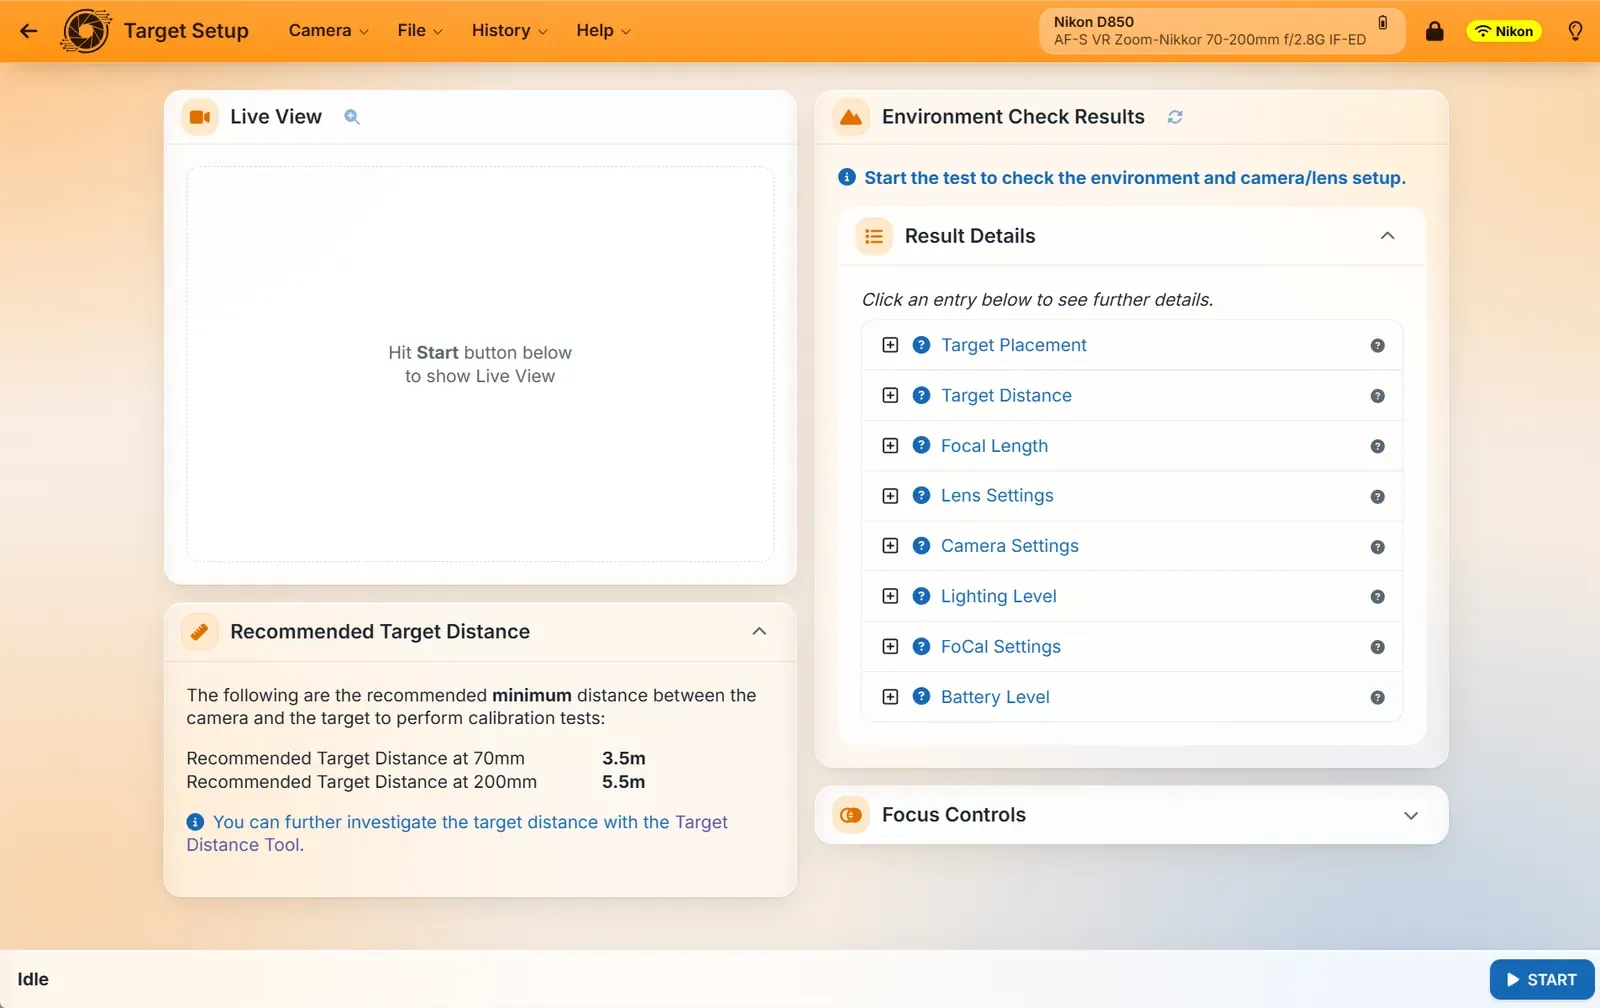
Target Setup checks the camera position, distance, light, camera and lens settings and battery, and tells you what to change.
- 3
Calibrate
Choose Focus Calibration and press Start. FoCal takes and measures the shots and works out the best autofocus adjustment by itself.
- 4
Sharper shots
See the before and after, and the setting FoCal chose. The camera keeps it for that lens from then on.
Confidence in the result before you start.
Accurate results need a good setup, but you don’t need a checklist: Target Setup checks it for you, with live view from the camera so you can line up the target.
- Target placement and distance, with the recommended distance for your focal length
- Lens and camera settings, and FoCal’s own settings
- Light level and battery
Each check shows green, or tells you what to change and why.
FoCal finds the sharpest setting, by itself.
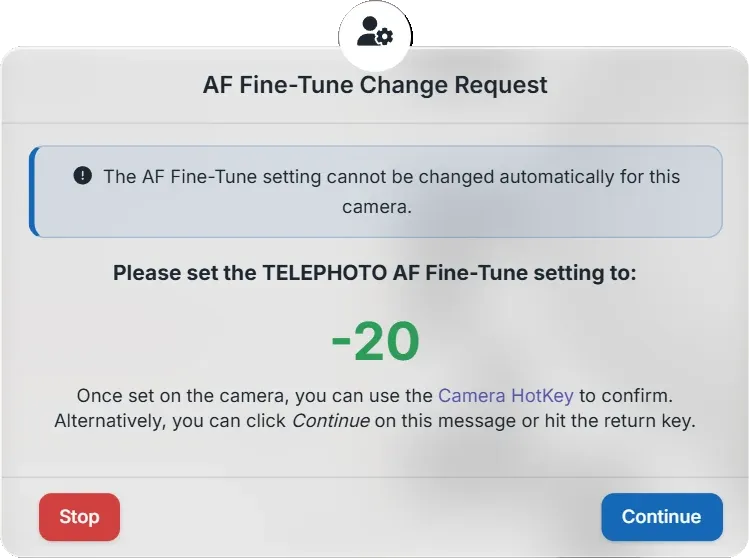
FoCal sets the camera up, changes the autofocus adjustment, focuses and takes shots at each setting, downloads and measures them, and homes in on the value that gives the sharpest result. You can watch the lens profile build up as it goes.
On zoom lenses, cameras that store separate wide and tele values get both.
When the camera won’t let FoCal change the setting
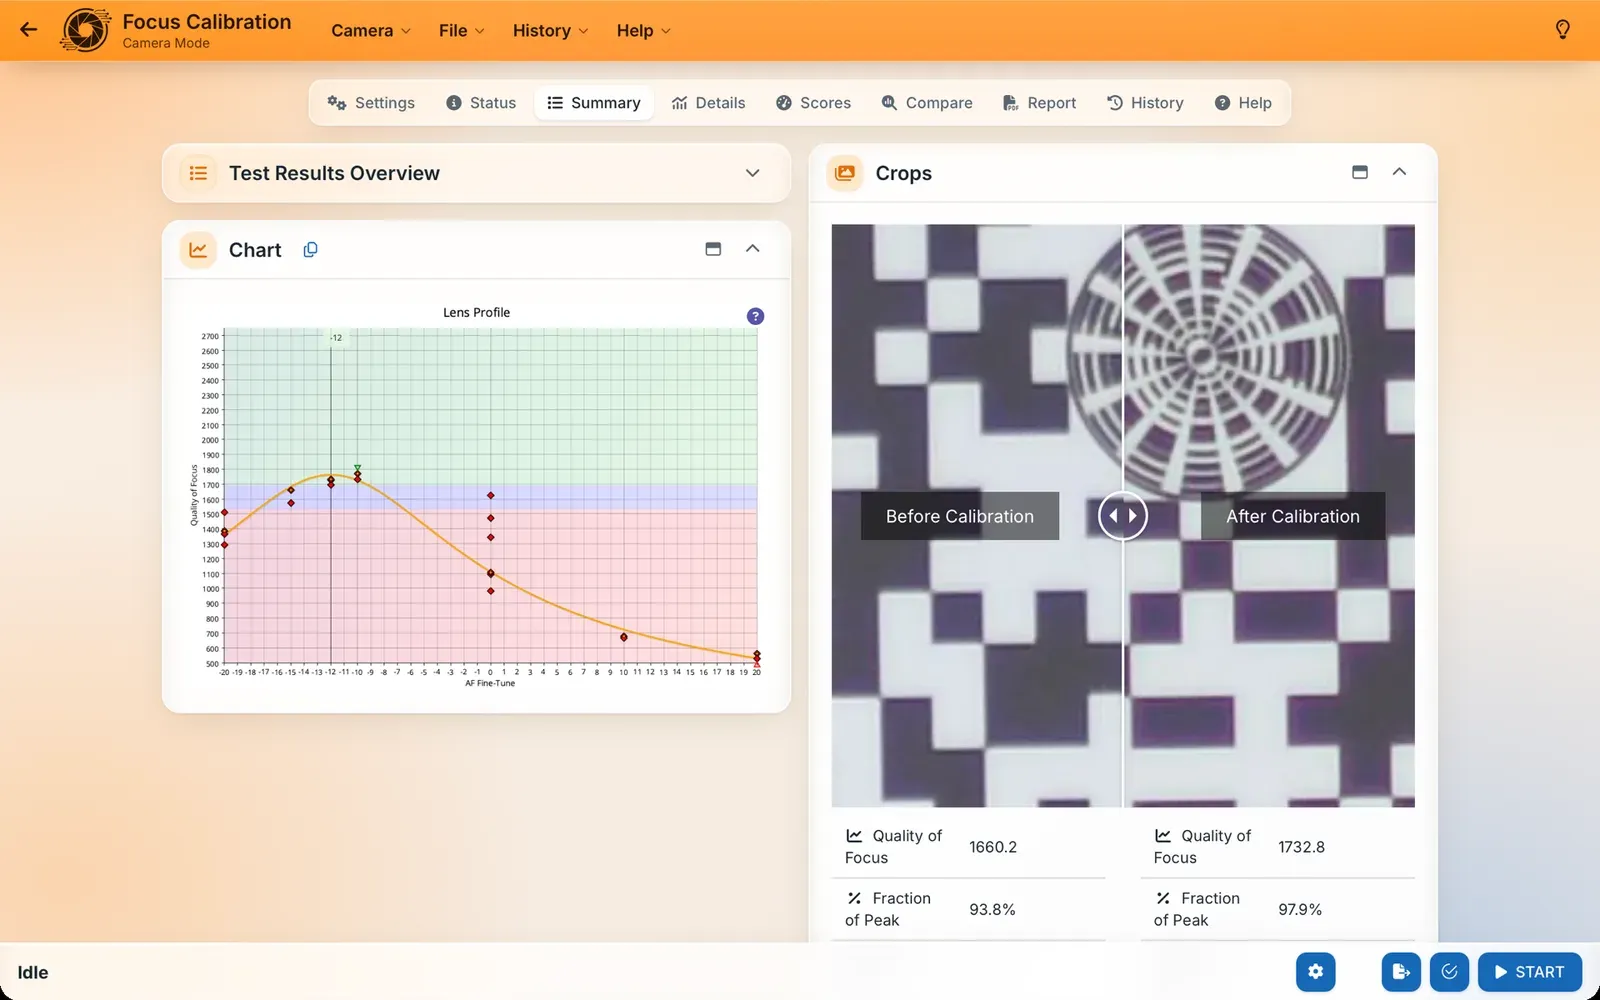
Some cameras, including all Nikon bodies and some Canon ones, don’t let software change the adjustment. FoCal still does the measuring and works out the value; it just asks you to set it in the camera’s menu, then carries on when you press Continue. Your camera page says which way your camera works, and where the setting is.
See the difference.
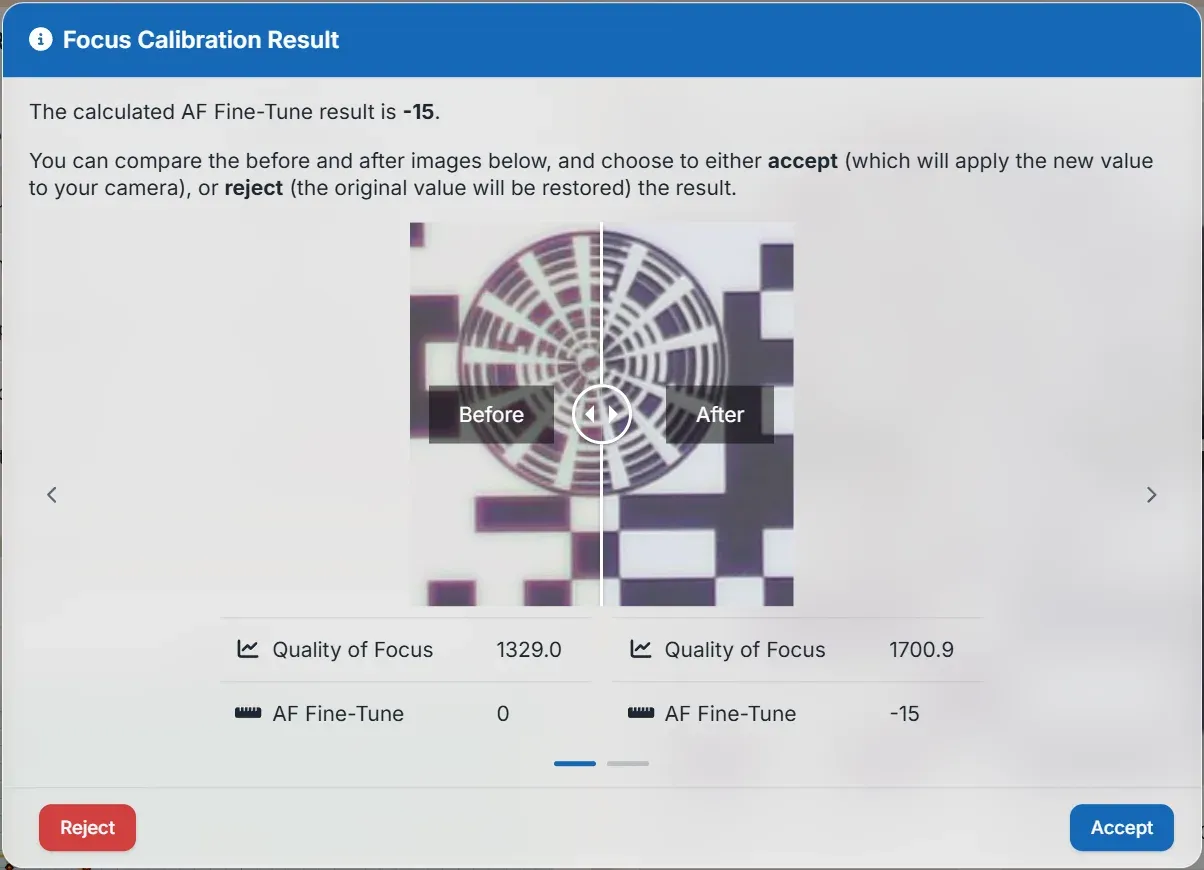
At the end, FoCal shows the value it worked out and the target before and after, side by side, with the quality of focus for each. Accept it to keep the new value, or reject it to put the old one back.
With FoCal Pro, the Compare tab shows how your result sits against other FoCal users with the same camera and lens, and every result goes into your History for the Kit Health Check.
A quick check between Kit Health Checks.
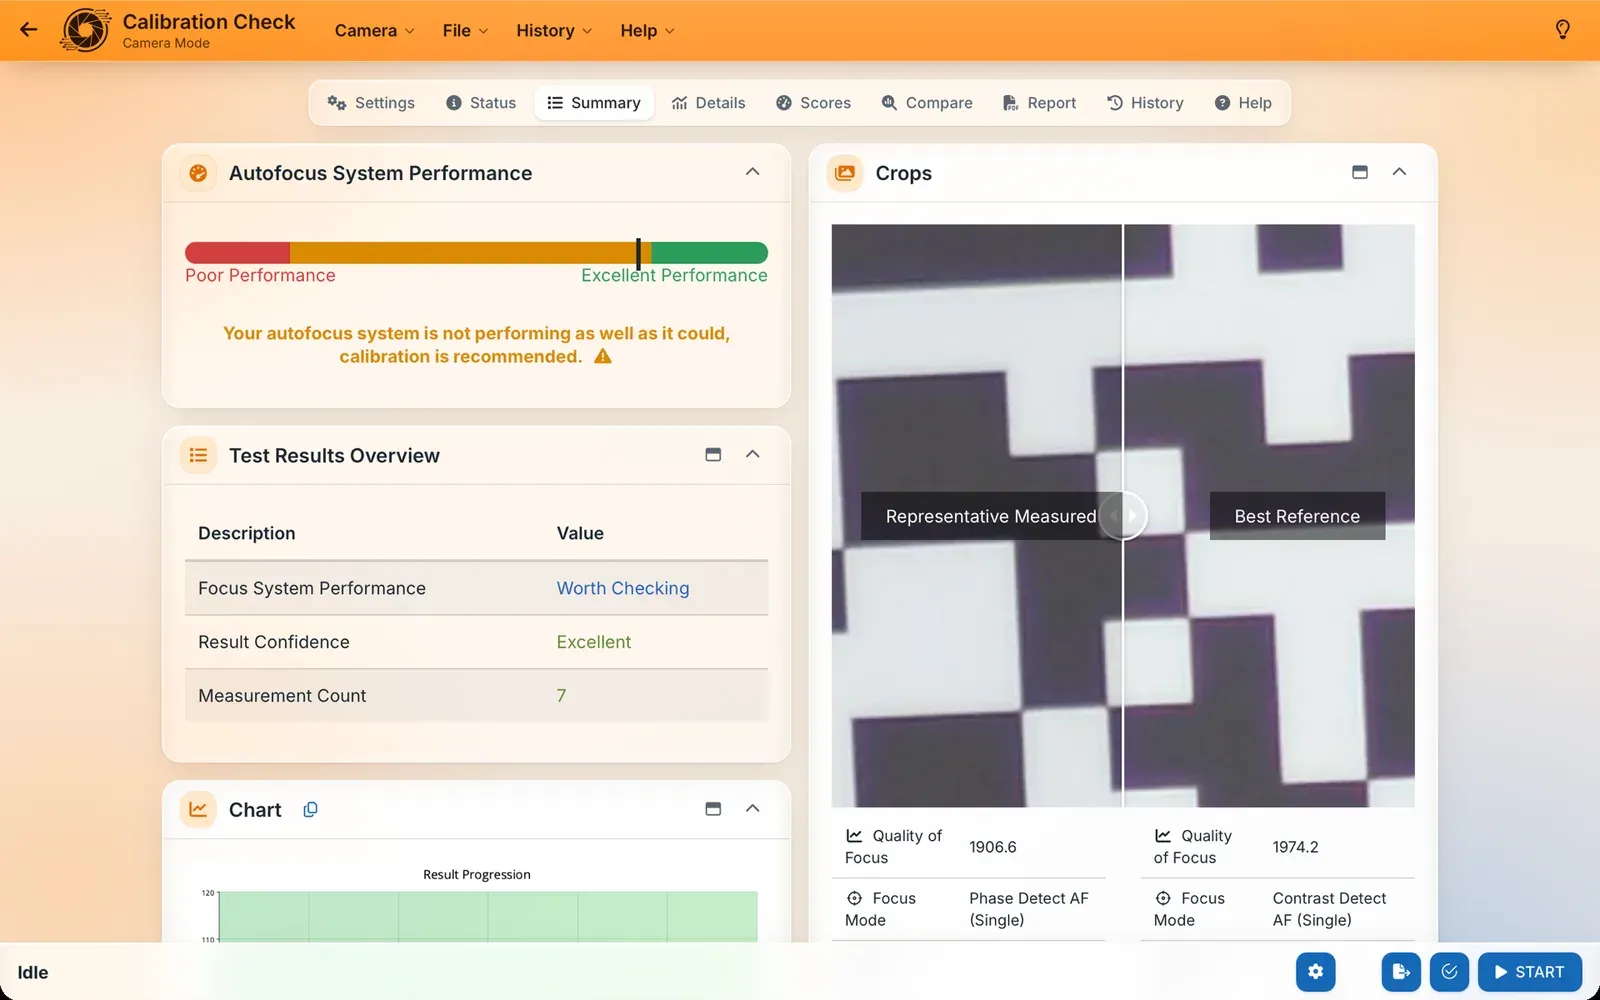
CalCheck compares how well your autofocus is doing now with the best FoCal can find, with no input from you, and tells you whether it’s worth calibrating.
Use it when there’s no time to set up for everything, for example before a shoot. It also works on tethered cameras that have no autofocus adjustment, so you can see whether things are working as they should.
Once you’re set up for a full check, calibrate instead: CalCheck isn’t much quicker and tells you much less.
Step-by-step instructions are in the Fully Auto guide, the CalCheck guide and the FoCal help. You’ll need the FoCal target: buy the Hard Targets, or print it yourself from the target images.
See what your lenses can really do.
Check FoCal supports your camera, then pick the edition that fits how you shoot.