Target Setup Utility – Aperture Sharpness
The Aperture Sharpness test only produces representative results if the camera lens is focused as well as possible on the target. To assist with this, the Target Setup utility – when started from within the Aperture Sharpness test – offers extra functionality.
It’s important to ensure the standard Target Setup checks pass appropriately as well – you can see this if you select the Check panel on the right side. Further information on this functionality is available at Target Setup Overview.
Note: MultiTest – new for FoCal 2020 – removes the need for this “pefect focus” step and gives more information about the aperture profile of your lens, including focus shift information. Take a look here: MultiTest
Opening the Aperture Sharpness Target Setup utility
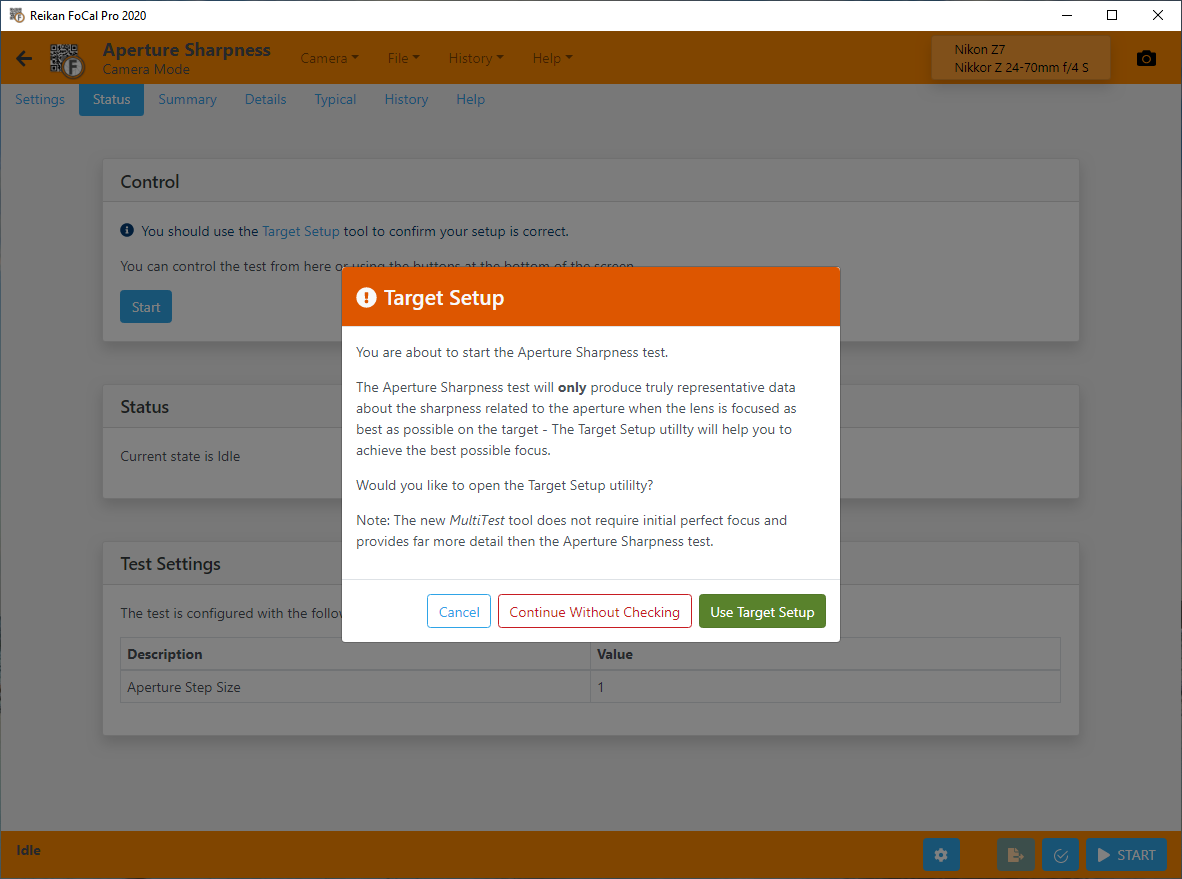
If you have not run the Target Setup utility before starting the Aperture Sharpness test, FoCal will warn you and give you the opportunity to use Target Setup:
Alternatively, you can manually open the Target Setup utility in Aperture Sharpness test mode by clicking the Target Setup link on the Status tab Control panel from within the Aperture Sharpness test, or clicking the Target Setup button on the bottom bar of the test.
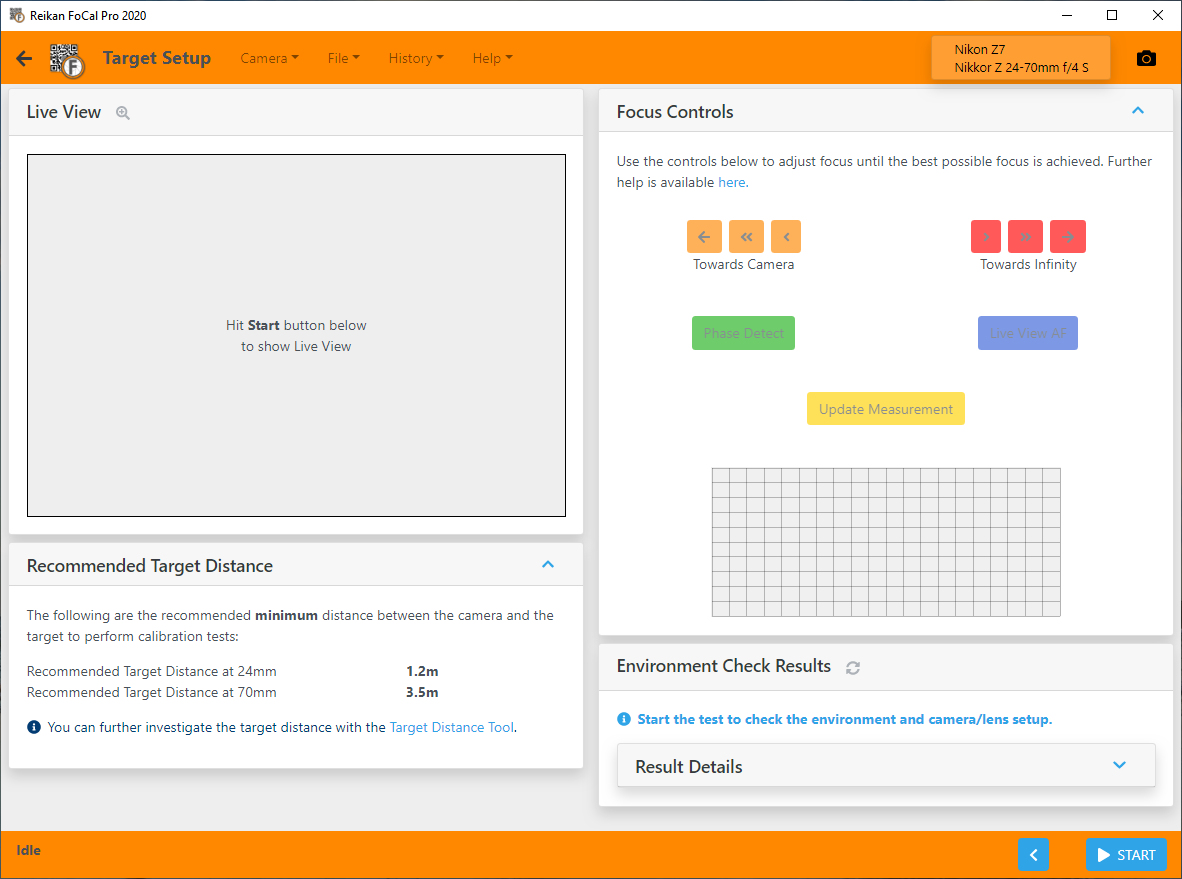
When you open the utility, you’ll see a window similar to this:
Checking your Setup
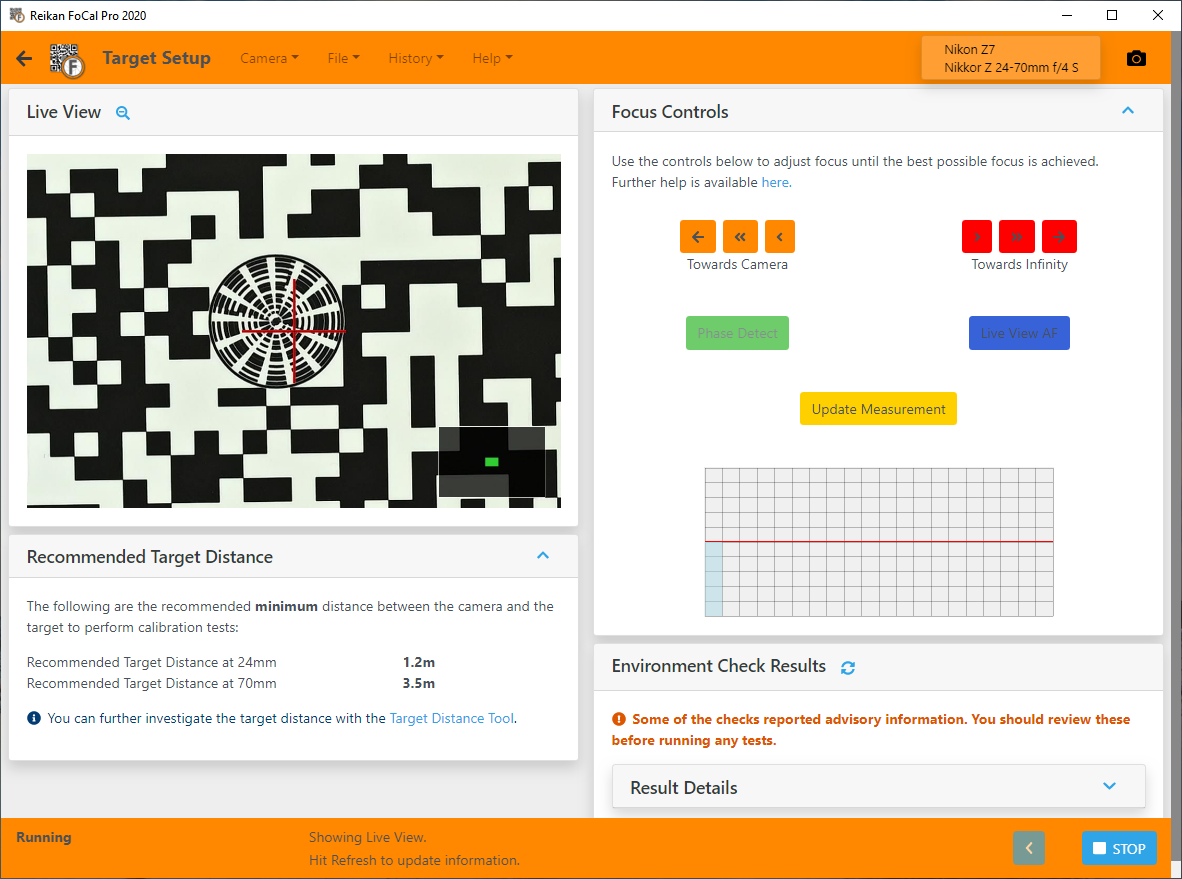
Hit the Start button and in a few seconds FoCal will get information from the camera and show you a zoomed live view image.
Here’s an example of the screen a few seconds after hitting the Start button:
Keyboard Shortcuts
Introduced in FoCal 3.2 to make using the Focus Controls a little easier, the following keyboard shortcuts are available:
- P – Phase Detect Autofocus
- L – Live View Autofocus
- U – Update Measurement
- Right Arrow – focus a small amount towards infinity
- Left Arrow – focus a small amount towards the camera
Getting Perfect Focus
The utility takes measurements of the sharpness of the image, and allows you to control the focus position and watch the changes so you can find the best focus.
Here’s an example of how the utility can be used. (Note that this example is with a well-behaved lens. Read the second below on Lens Focus Hysteresis for an explanation of performance on older/lower quality lenses)
Step 1 – Start the Test
When the test is started, it focuses and take a shot. When Live View is started, a measurement of the quality is taken and the first bar is shown in the chart, as shown in the example above.
The camera performed a focus operation, then FoCal measures the quality and shows the result as a blue bar (same as the Live View AF button) on the chart on the right of the screen.
This chart shows relative quality levels between the shots you take. There is no scale, it just shows whether a shot is sharper (the bar taller), or not as sharp (the bar shorter) than other shots. The red horizontal line shows the level of the best shot so far. If this is a little confusing, keep reading as it should become clearer…
Step 2 – Focus in one direction
The next step is to see how close to perfect focus we are. Pick a direction (it doesn’t matter which), and hit the single arrow – so either the orange “<” button (focus moves towards the camera) or the red “>” button (focus moves away from the camera).
Wait for a new bar to appear on the chart, and then repeat a few times to see how things change:
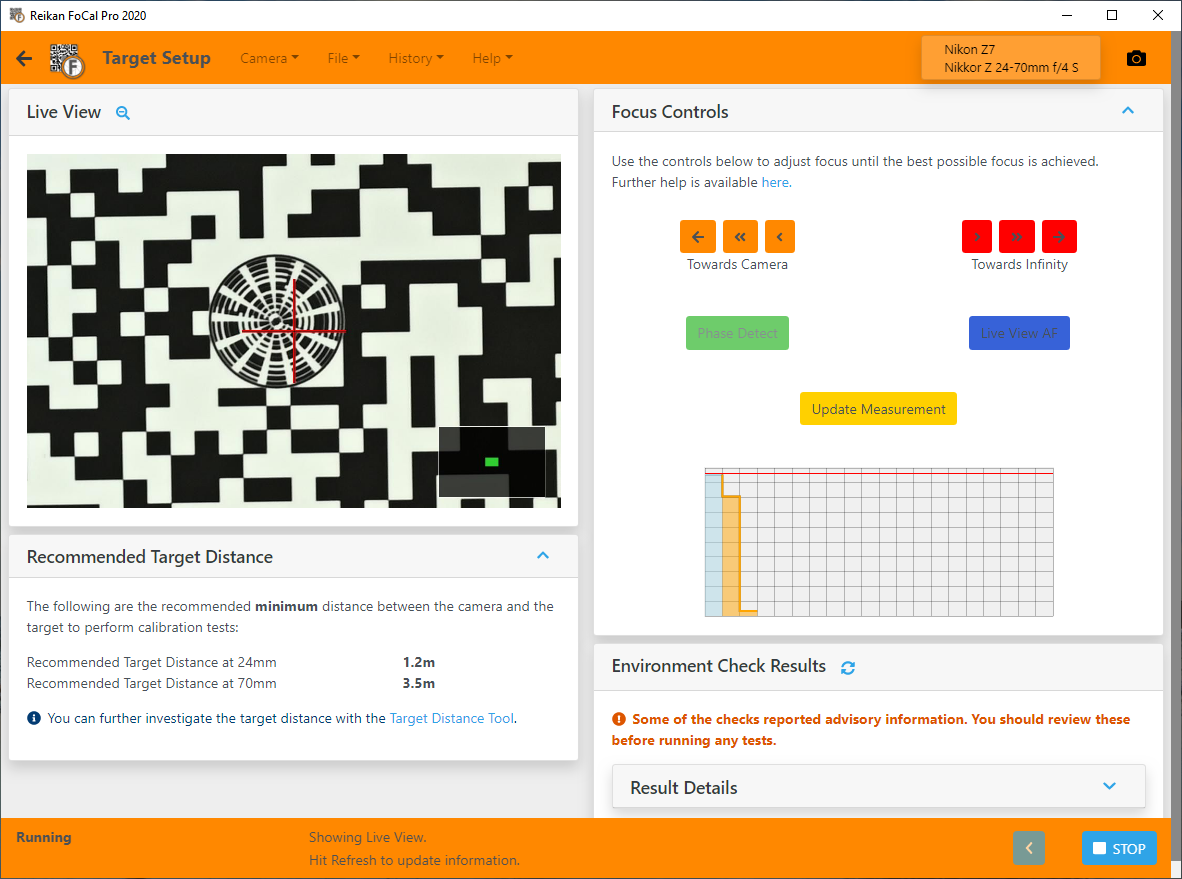
The 2 new bars on the chart shows the results of our small focus changes. We used the orange “<” button 2 times, moving the focus fractionally towards the camera each time, and the bars shown on the chart are also orange (matching the button pressed) so we know what happened.
The first click made the bar a little smaller – this shows a drop in quality. The second click caused the focus quality to drop more significantly, so we now know for definite that we’re moving away from the best focus position.
Step 3 – Focus in the other direction
From the step above, we know we’re moving in the wrong direction if we keep pressing the orange “<” button, so we switch direction and move the lens focus a little towards infinity with the red “>” button, repeating a few times:
Some red bars are now added to the chart, indicating that we were using the red “>” (towards infinity) button. The first click shows an improvements, the second click shows an the sharpness to the best level so far, and the third shows the quality starting to drop away again.
Step 4 – Double checking
A single click back towards the camera (orange) shows the quality return back to the red line on the chart:
We’ll leave the utility here and run the Aperture Sharpness test and be confident of being very close to the best focus position.
Note: The bar height of the latest measurement doesn’t need to be absolutely at the top – as long as it’s close to the best focus quality you’ve measured (the red line) then it’s acceptable.
Recap
To recap:
- we’ve been given an initial starting point (the blue Live View AF bar on the left of the chart)
- we focused a bit towards the camera until the quality definitely dropped
- we then focused a bit towards infinity, building some confidence of where the best quality level is
- we then adjusted focus a little until the bar height was very close to the red line
Further Information
Larger Movements
The three-arrow and two-arrow buttons move the lens a larger amount than the small arrow. Generally, these are not used, but if you have a lens that is not showing any sign of movement after multiple clicks (e.g. 10 or more) of the single arrow buttons then you may need to use the larger movement option.
Manual Operation
If you have a manual focus lens - or just want to adjust using the focus dial manually – the utility offers this functionality. Click the yellow Update button to get FoCal to take a new measurement without adjusting anything else on the camera. This will be shown as a yellow bar on the chart.
Lens Focus Hysteresis
The example above is a pretty perfect example of how this test should run. It was performed with an excellent quality lens (Nikon 24-70/4S) under very good stable lighting conditions. Each click in either direction showed an immediate change in direction and a progressive, repeatable change in quality, exactly how we would hope it would work.
However, this is not the case for all lenses. Older design and cheaper lenses have motors that are not so well behaved, and there can be a considerable amount of lens drive hysteresis exhibited by these lenses. For info, the definition of hysteresis is
“the phenomenon in which the value of a physical property lags behind changes in the effect causing it”
This means that we might click the lens a few steps in one direction, and it actually continues to move in the other direction, then stops, and then finally starts to move in the correct direction. It’s important to consider this when trying to run through the steps above to find the perfect focus, as you may need a considerable number of clicks (10-20) in order to be sure that you’re moving the lens in the right direction.
Remember, the result you’re aiming for is a good focus quality. Use the Live View image to help guide you, and run enough camera AF and manual steps to be sure you’re well focused and your Aperture Sharpness results will be representative. If you have any doubts about the results, re-run the Target Setup utility above and then re-run the test and check you get similar results on the second time round.
MultiTest
MultiTest – introduced in FoCal 2020 – removed the need for this “perfect focus” step and gives even more information about the aperture profile than is possible with the Aperture Sharpness test.
Take a look here: MultiTest