The evidence first
Before the how and why, here’s what 45,042 FoCal calibrations on two of the most popular enthusiast DSLRs, the Nikon D850 and the Canon EOS 5D Mark IV, say about the adjustment they needed:
| Significant | Noticeable | Minimal | None | |
|---|---|---|---|---|
| Nikon D850 | 67% | 19% | 9% | 5% |
| Canon EOS 5D Mark IV | 50% | 27% | 15% | 8% |
- Almost 9 in 10 lenses on the D850 and almost 8 in 10 on the 5D Mark IV would take visibly sharper pictures after calibration (an adjustment of 2 or more).
- 67% of D850s and 50% of 5D Mark IVs needed a significant adjustment, 4 units or more: the kind you can see straight away.
There’s more of this on the evidence page. For now, here’s why your DSLR needs it.
Meet the FoCalCam 3000
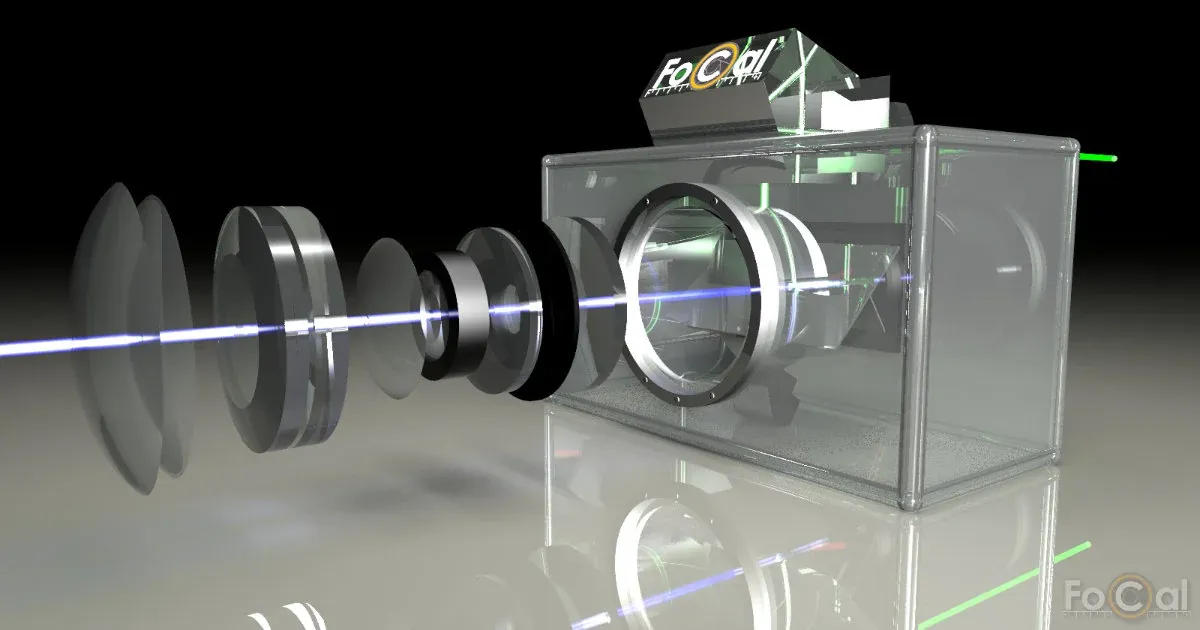
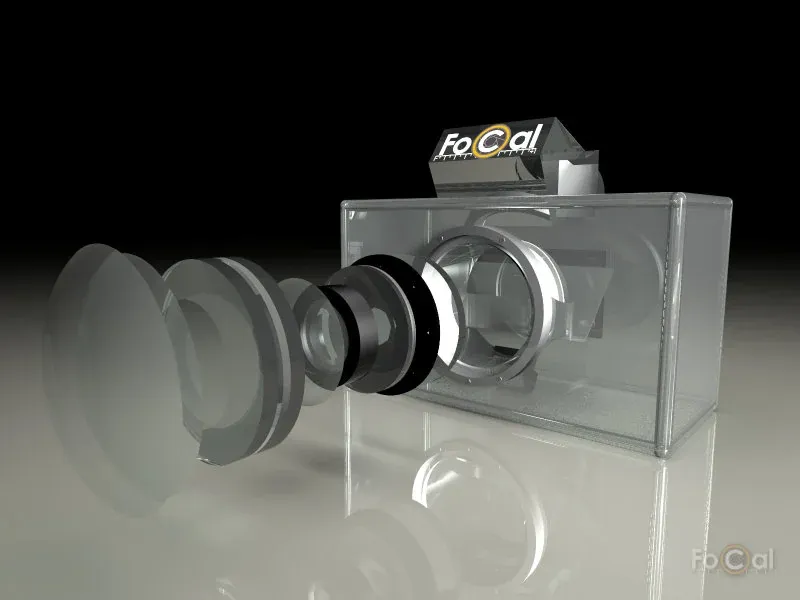
To explain how a DSLR focuses I invented a camera. It isn’t very practical: the lens elements float in mid-air, and it can’t take a single photo. But it shows the parts of a DSLR that matter for autofocus, and where things go wrong.
Setting up the shot
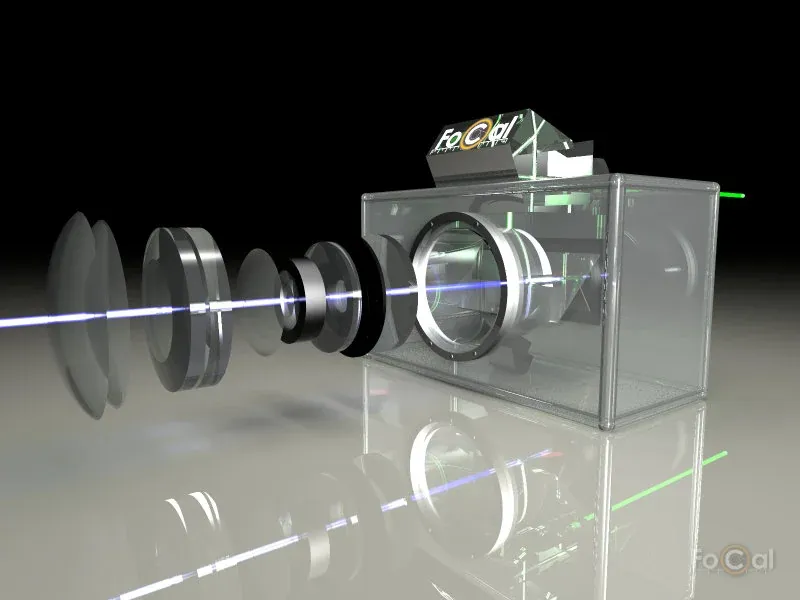
You’re looking through the viewfinder, framing your shot. Light comes in through the lens (blue), through the inside of the camera, and out of the eyepiece (green) into your eye:
Take away the lens and the camera body, and you can see what happens to that light inside:
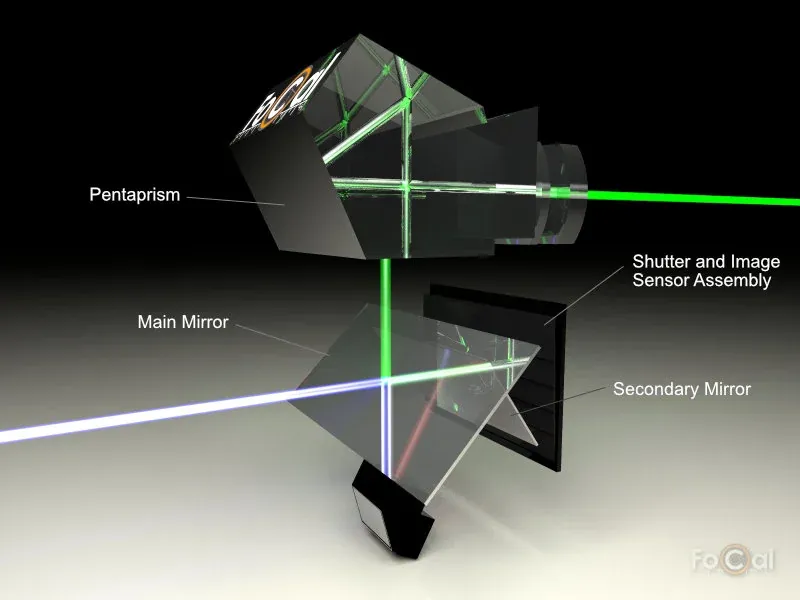
The light hits the main mirror. It’s semi-transparent, so most of the light goes up into the pentaprism, bounces around, and comes out of the eyepiece. But some goes through the main mirror, hits a small secondary mirror behind it, and is sent down to the AF module in the bottom of the camera:
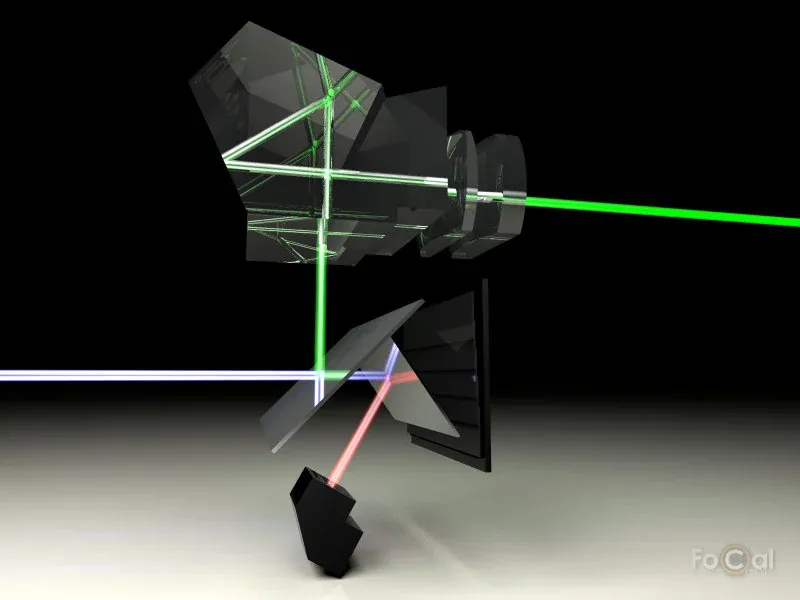
So when you half-press the shutter button, you aren’t the only one looking at the scene. The AF module is looking too, and that view is what the camera uses to focus.
Taking the shot
Press the shutter all the way, and a lot happens very quickly:
- the main mirror flips up towards the pentaprism,
- the secondary mirror folds up behind it,
- the shutter in front of the image sensor opens.
Now the light goes to one place only: the image sensor.
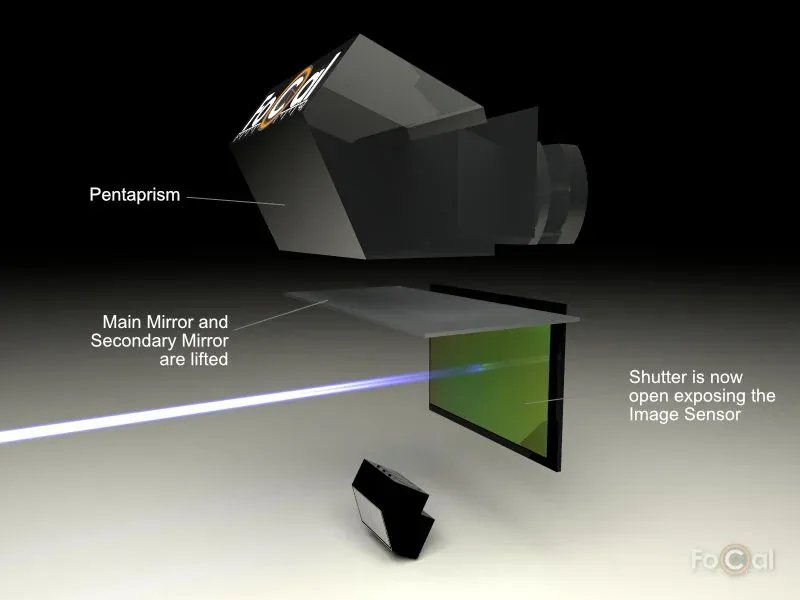
Focus is not measured at the image sensor
A DSLR measures focus in the AF module, a completely different part of the camera from the image sensor that takes the picture.
That’s the key to everything that follows, so here’s an example of what happens when you take a shot:
- You press the shutter button
- The AF module measures how far out of focus the subject isOffset +27
- The AF processor works out how far to move the lens85 steps
- The lens moves, the mirror lifts, the shot is takenSharp
- You aim at your subject and press the shutter button.
- Light comes through the lens, off the secondary mirror and into the AF module. The AF sensor in it reports how far out of focus the subject is: say +27.
- The AF processor takes that +27 and, using calibration data stored in the camera, works out that the lens has to move 85 steps towards infinity for the picture to be sharp at the image sensor.
- The lens moves (perhaps a few times over), and the shot is taken.
At no point does the camera check the focus at the image sensor. Everything depends on a fixed, known relationship between what the AF module measures and where the lens has to be for a sharp picture on the sensor.
(How the AF sensor actually measures focus doesn’t matter here. If you’re curious, it’s the same idea as on-sensor phase detect autofocus, just in a separate module.)
Factory calibration
When your camera was made, its autofocus system was tested and calibration data was written into it. That data makes up for tiny differences in the position of:
- the AF module and the parts inside it,
- the image sensor,
- the main mirror, and the seats it rests on,
- the secondary mirror,
- the lens mount.
It corrects for the difference between the perfect design and the real parts in your camera, on the day it was calibrated. That might have been months, years or even decades ago. And it was done with the factory’s lens, not yours.
Next: what can change that relationship between the AF module and the image sensor.