Calibration Check
The FoCal Calibration Check utility can assess the current state the phase-detect autofocus system of your camera/lens and determine if calibration is required.
This tool required NO user interaction, and can even run with (supported) cameras that do not have any focus adjustment capability.
Opening Calibration Check
You can open Calibration Check either from the Camera menu, or from the Calibration Check card on the Camera page.
Setting Up
In order to use Calibration Check, you need to ensure that the camera and target are set up correctly. Target Setup utility is an automated utility which will help you do this - all the information you need is here.
You can access Target Setup from the Target Setup button on the test footer bar, from Camera menu or from the Camera status page.
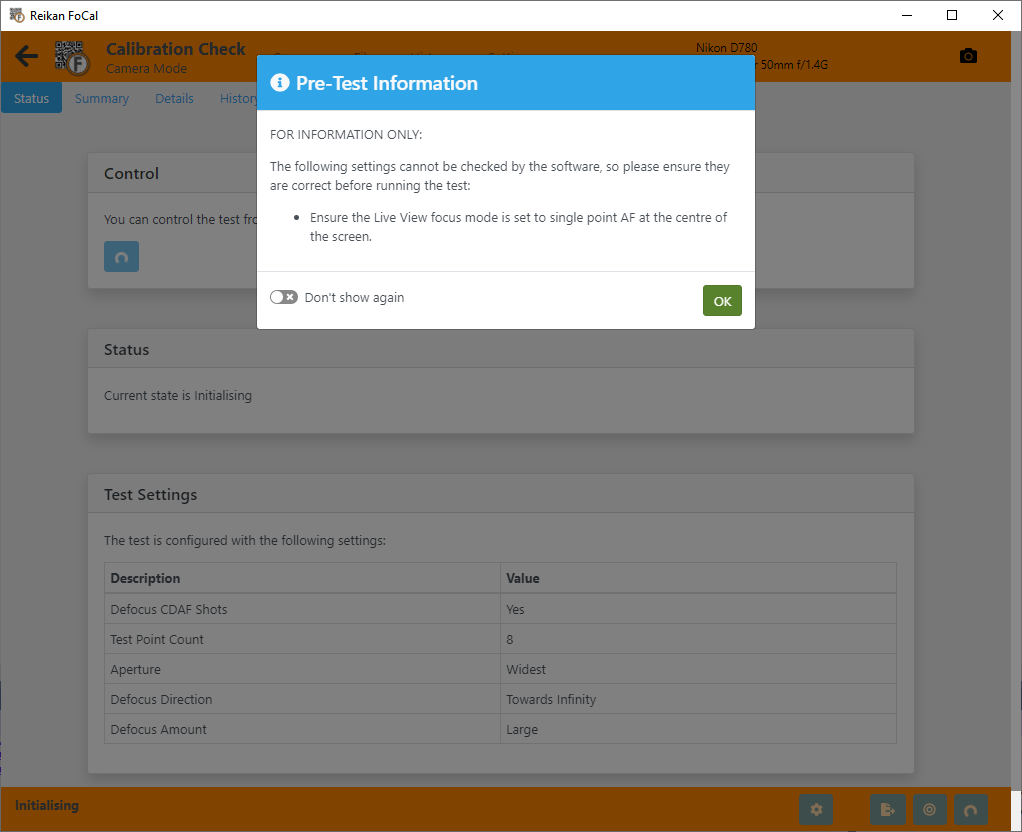
Once you have successfully confirmed your camera and target setup, you need to ensure that both Live View and non-Live View focus points are set to the centre point:
- Look through the viewfinder, and ensure the focus point is set to the centre focus point. You may need to change the focus mode to single-point mode in order to set the position.
- Start Live View, and ensure the focus point is also set to the centre. Again, you may need to change the focus mode to single point mode in order to set the focus point position.
Note: not all cameras will allow you to enable Live View when connected to a computer (e.g. Nikon DSLRs). If Live View will not start, you will need to stop the test, disconnect the camera and confirm the Live View focus position with the camera disconnected, then reconnect and restart Calibration Check.
When the test starts, there is an information message that is shown to remind you to adjust the focus points for both modes to the centre, but FoCal will (currently) not verify this, so ensure you have correctly performed this step otherwise the results may be incorrect.
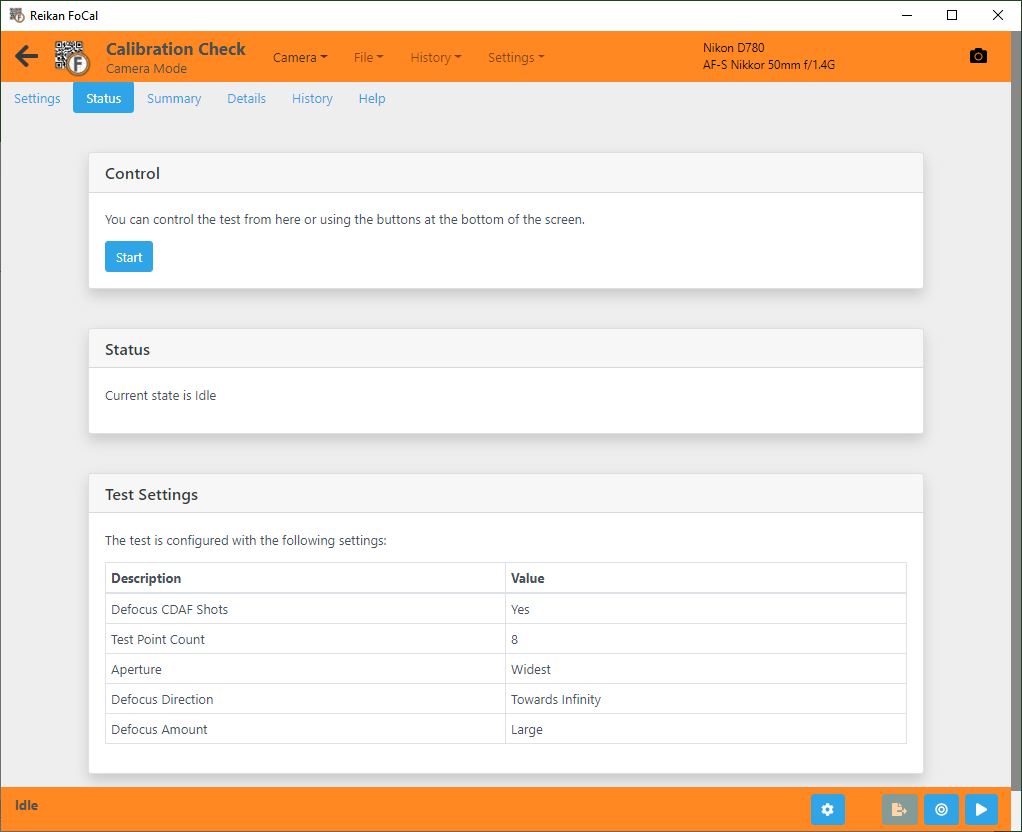
Running the Calibration Check
Once the setup steps above are complete, you are ready to run the Calibration Check.
You can start the test with the Start button in the Status tab, or with the Start button on the test footer bar.
The test requires no user interaction and takes a few minutes to run. The information obtained is updated as the test runs.
Reviewing the Results
The Summary page shows the essential results for the Calibration Check:
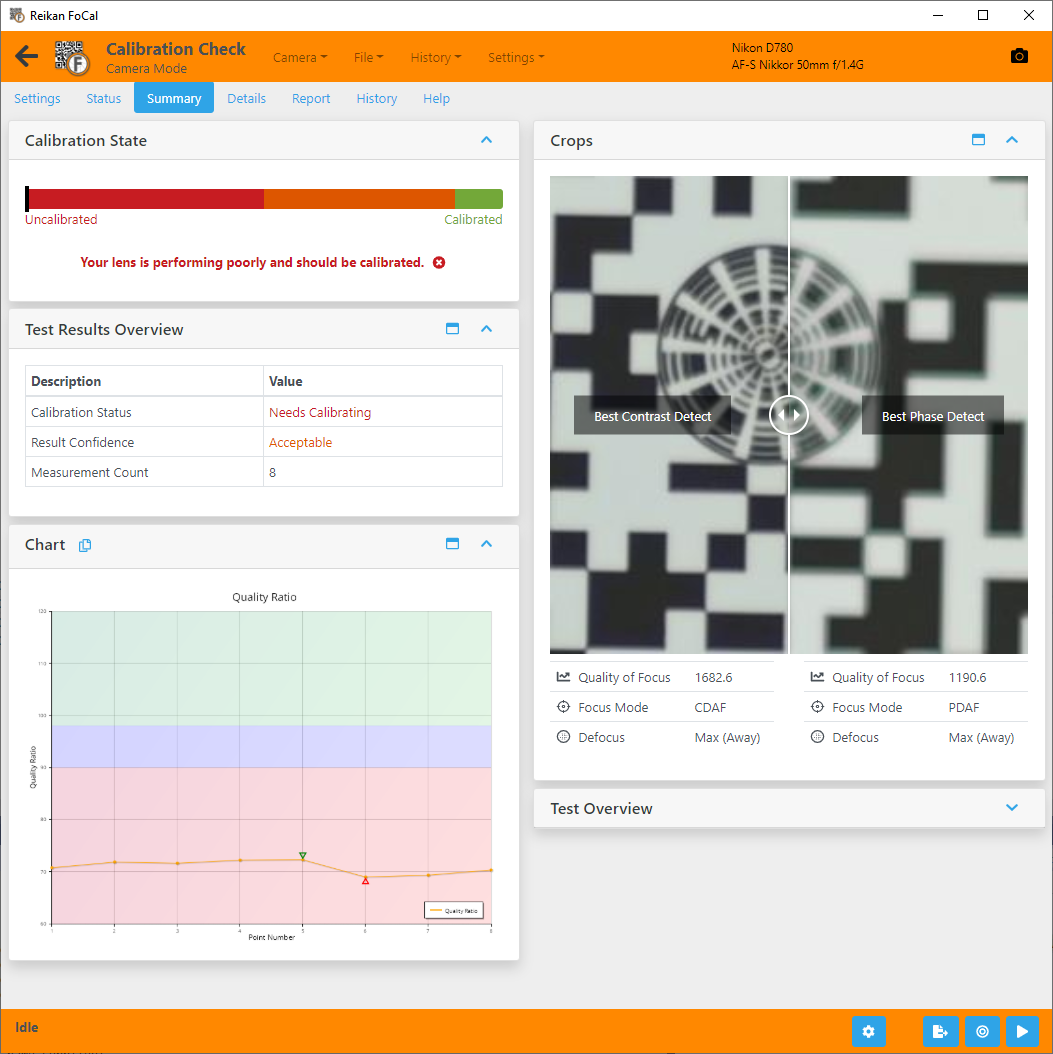
Calibration State
The Calibration State card indicates the current status of the lens calibration.
The gauge runs from red on the left representing poor calibration, through to green on the right which represents good calibration (the marker is the black line – in the example above pushed to the far left as this lens is not well calibrated).
Test Results Overview
The Test Results Overview card shows a few essential test results. In this case, it shows that the lens is in need of calibration, and shows the number of measurements taken.
Chart
The Chart card shows the Quality Ratio chart, which shows how well the lens is performing.
The orange line shows the measurement results. If this line is mostly in the red area, the lens is poorly calibrated (as seen in the example above). If in the blue area it is acceptably calibrated, and in the green area it is performing well.
Crops
The Crops card shows the comparison between the best Live View and best non-Live View (phase detect focus) images.
You can slide the bar in the crop images left/right to better review the comparison. You can also make the crop card large with the maximise button on the top of the card (this applies to any card which have this button).
Some measurement values are indicated below each side of the crops.
Test Overview
The Test Overview card gives basic information about the test – for example which camera and lens were used.
Interpreting the Results
The example above shows a poorly performing lens which is in need of calibration. You can tell this from the Summary tab:
- The marker on the gauge in the Calibration State card is in the red area
- The Test Results Overview shows that the lens requires calibration
- The line on the Quality Ratio chart is all within the red area.
- The Best Phase Detect crop is significantly poorer quality than the Best Live View crop.
Contrast this with the following image of the lens after calibration

You can clearly see that:
- The marker on the gauge in the Calibration State card is in the green area
- The Test Results Overview shows that the lens is calibrated
- The line on the Quality Ratio chart is all within the green area.
- The Best Phase Detect crop is comparable to, or better quality than the Best Live View crop.
Further Details
Settings Tab
Further information about the settings for this test is available at Settings - Calibration Check.
Details Tab (FoCal Pro)
The Details tab has the following information
- A selection of charts to review different aspects of the measurements – including lens profile, astigmatism/colour information and information about movements of the image as the lens is operated
- Detailed results information
- A list of all shots along with general information
- Detailed information about the capture settings for any selected shot
- A selection of crop images, including the analysed region of any selected point.
See Details - Calibration Check for more information.
Charts
Calibration Check offers the following charts (click a link for detailed information):
Quality Ratio – Calibration Check
Quality Value – Calibration Check
Typical Tab (FoCal Pro)
The Comparison tab will show you how your camera/lens combination compares to other users of the same equipment
See Typical Tab for more information.
Report Tab (FoCal Pro)
The Report tab allows you to save a PDF report summary of your test results.
You can also choose to save a CSV file containing the numerical results information for further analysis.
See Report Tab for more information.
History Tab (FoCal Pro)
The History tab shows previous tests run with the same camera/lens combination, and a basic summary of the results.
Double-clicking on an entry will open the details in History mode so you can review the test results from previous test easily and see how your equipment has changed.
See History Tab for more information
Help Tab
The Help tab provides an overview of the test purpose and operation, and link to the online help information.