Focus Calibration
Reikan FoCal’s automatic Autofocus Calibration can determine the calibration values required for your camera and lens at the touch of a button!
Opening Focus Calibration
With a camera connected, from the Camera page, choose Calibration, or use the menu to select Camera > Calibration.
This will open the Calibration tool:
Before running a calibration, you need to make sure your camera and target is set up correctly. The Target Setup utility is an automated utility to help you do this, along with all the information you need here. Be sure to be familiar with the setup and have run Target Setup before running the calibration otherwise your results may not be accurate.
Settings Tab
The settings that will be used for this test are shown in the Settings panel. The default values are usually most appropriate, but if you are an expert user you may wish to adjust the settings.
See Settings – Calibration for further information.
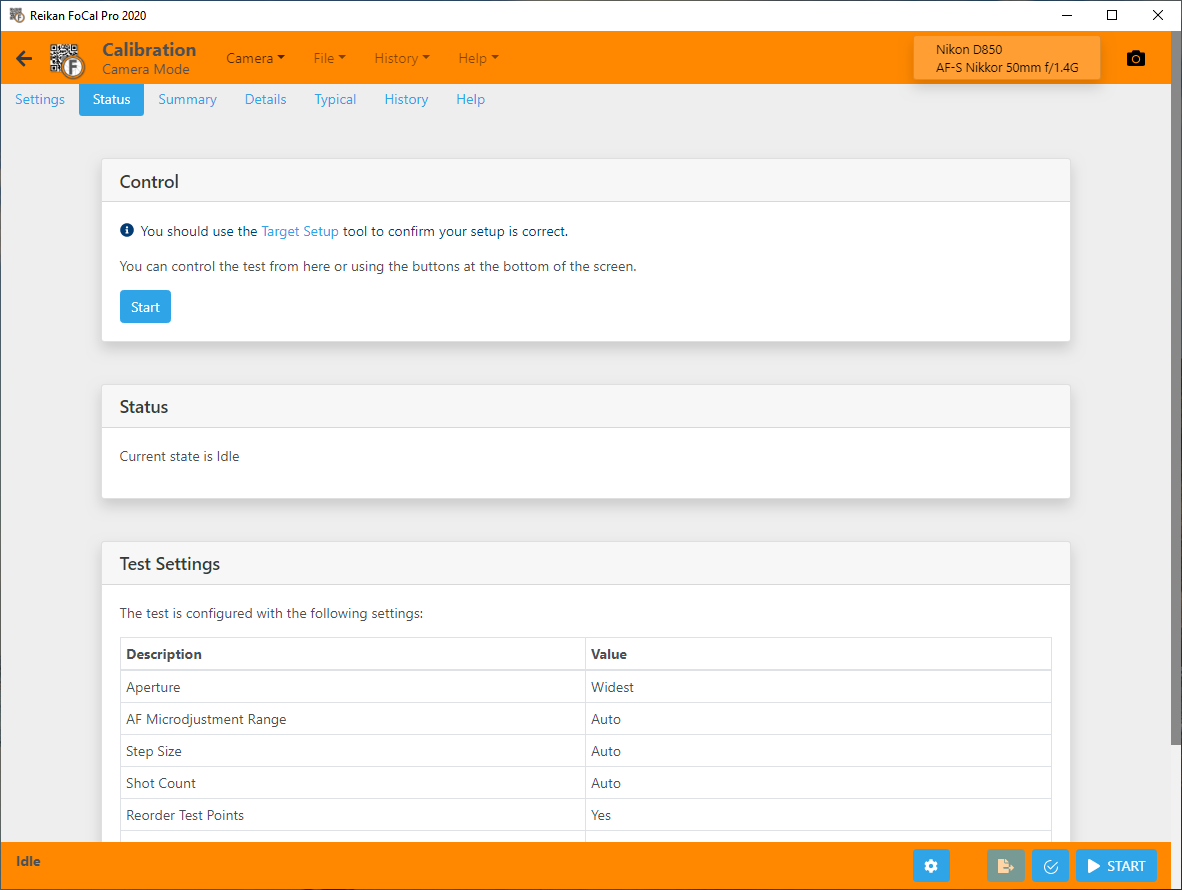
Status Tab
The Status tab is the page that is shown when you open the test (see the image above).
This shows the current state of the test and the settings that will be used when run.
See Status Tab for more information.
Running the Calibration
To start the calibration, simply hit the Start button either in the Status tab or on the control bar at the bottom of the screen.
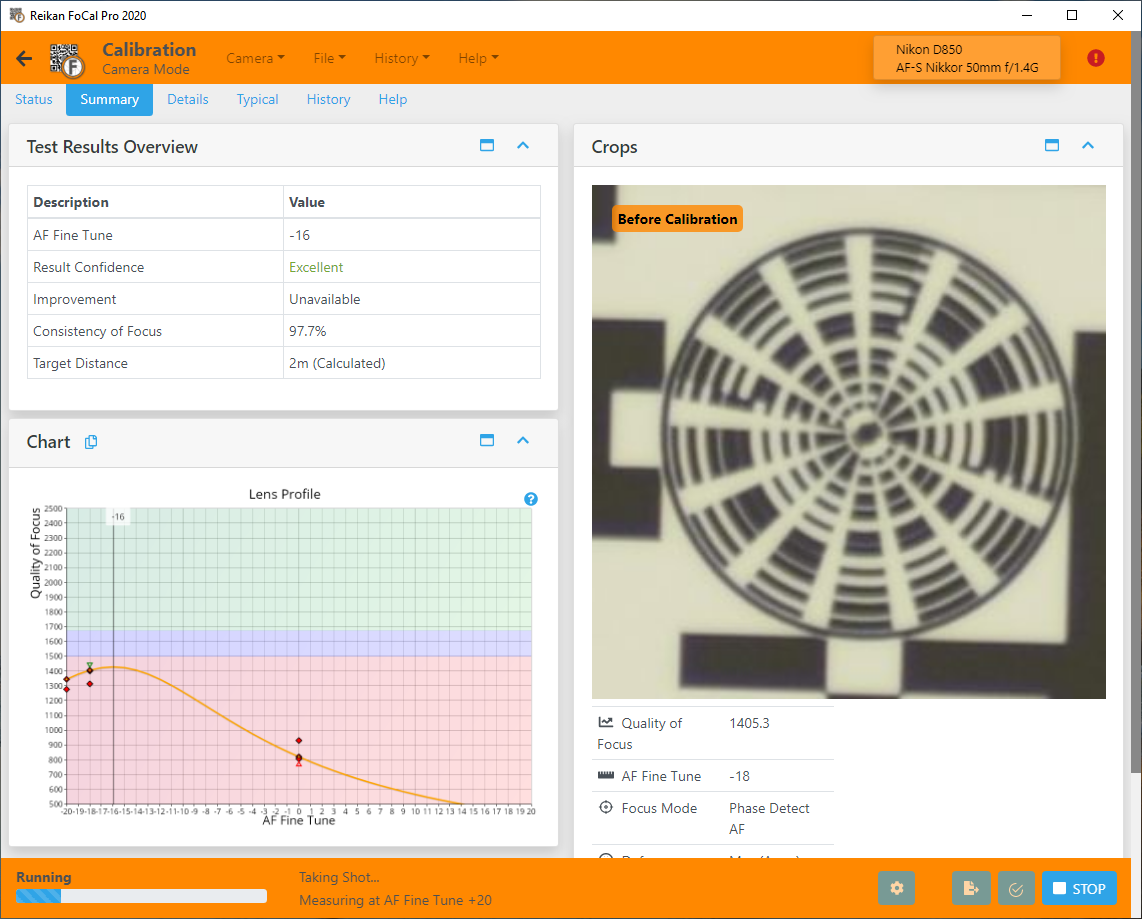
As the calibration progresses, you will see information updated on the screen similar to this:
“Hands Free Mode” and “User Assisted Mode” Cameras
Depending on whether your camera supports Hands Free Mode or User Assisted Mode (see here for the camera support list), you may be prompted periodically to change the Focus Adjustment setting on your camera. For detailed information about this, please see here.
When the calibration is complete, you will see an information message similar to this, along with both images displayed in the main window:

Reviewing the Results
You can click around the charts and panels while the calibration is running, but the information in the Results panel may not be truly representative until the test is complete.
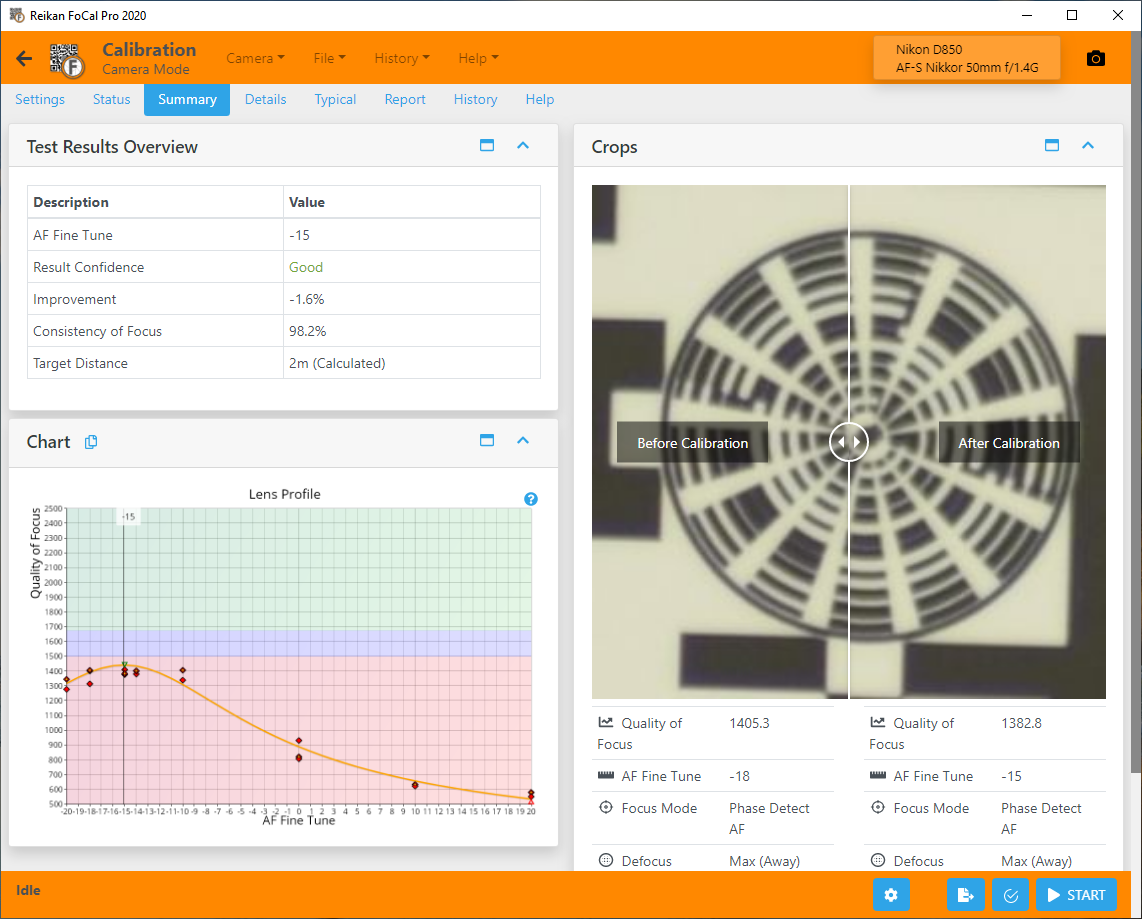
The Lens Profile chart shows you how the sharpness of your lens changes across the Focus Adjustment range. Looking at the example above - horizontally the scale runs from -20 to +20, and the vertical scale is an indication of the sharpness of the image, so the higher a marker the sharper the image.
The calibration result - the best Focus Adjustment setting - will be where the image is sharpest. In the screenshot above, this is around -16, and is shown by the black vertical line.
The “?” icon to the right of the chart will take you to a web page giving you lots more detailed information about the chart you’re looking at, so if you want to dig deeper you can click the link.
Further Details
Settings Tab
Further information about the settings for this test is available at Settings – Calibration.
Details Tab (FoCal Pro)
The Details tab has the following information
- A selection of charts to review different aspects of the measurements – including lens profile, autofocus consistency, astigmatism/colour information and information about movements of the image as the lens is operated
- Detailed results information
- A list of all shots along with general information
- Detailed information about the capture settings for any selected shot
- A selection of crop images, including the analysed region of any selected point.
See Details – Calibration for more information.
Charts
Calibration offers the following charts (click a link for detailed information):
Lens Profile - Fully Auto Calibration
The following charts are available in FoCal Pro:
Historic Results - Fully Auto Calibration
Focus Consistency - Fully Auto Calibration
Astigmatism Factor - Fully Auto Calibration
Red-Blue Ratio - Fully Auto Calibration
Red-Blue Quality - Fully Auto Calibration
Result Convergence - Fully Auto Calibration
Image Motion - Fully Auto Calibration
Front/Back Focus - Fully Auto Calibration
Typical Tab (FoCal Pro)
The Comparison tab will show you how your camera/lens combination compares to other users of the same equipment
See Typical Tab for more information.
Report Tab (FoCal Pro)
The Report tab allows you to save a PDF report summary of your test results.
You can also choose to save a CSV file containing the numerical results information for further analysis.
See Report Tab for more information.
History Tab (FoCal Pro)
The History tab shows previous tests run with the same camera/lens combination, and a basic summary of the results.
Double-clicking on an entry will open the details in History mode so you can review the test results from previous test easily and see how your equipment has changed.
See History Tab for more information
Help Tab
The Help tab provides an overview of the test purpose and operation, and link to the online help information.